Capture any information about Clients like communication, key points, summary, etc.

Written by Shruti Patel
Recruiters often manage multiple clients, each with unique requirements. To maintain consistent and high-quality service, it's essential to document crucial client details. The client Screen in the system plays a pivotal role here. It allows recruiters to add, view, edit, and delete notes, making vital information accessible across the platform. This makes it easier for the whole team to stay updated and work together, which helps them serve clients better.
Step 1: Go to the Clients module from the left-hand side menu.
Navigation Link: https://app.ismartrecruit.com/searchClient
Step 2: Now There are two options where notes are available in the Clients Screen.
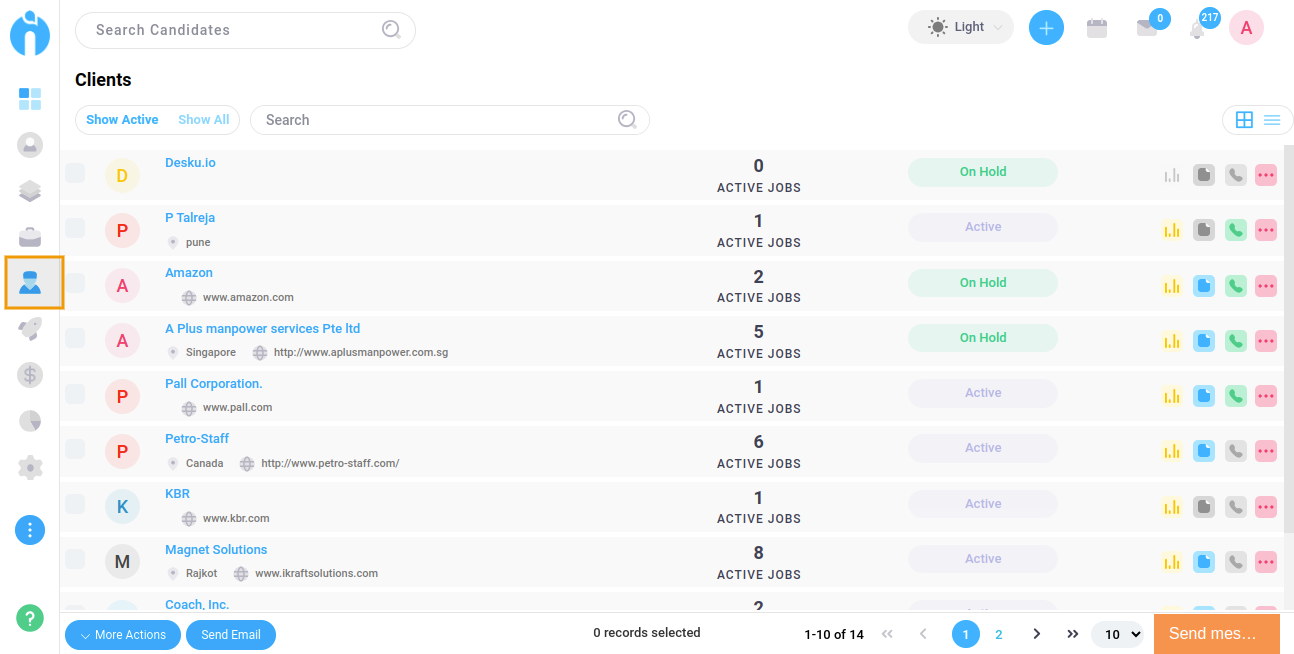
1. Click on the Notes icon available on the Clients screen for Grid View.
2. Click on the Notes icon, near the Client Name for List View.
Notes in Grid View


Notes in List View


Note: If the note is already added the icon of the note will be blue and if not then grey.
Step 3: Select the type of Notes from the dropdown that helps to easily classify based on the selected category. By default “General” will get selected but you may select other types that are listed below.
Note Type
1. Availability
2. Client Note
3. Contracting
4. Email
5. Feedback
6. General
7. Job Order
8. Phone Call
9. Recruiting
10. Referral
11. Tags

Note: It is customizable from the “Manage Catalogue” screen available in the Admin section. For detail read the article ‘Customize Master Values (Catalogue)’.
Navigation-link: https://betahelpcenter.ismartsolulab.com/job-management/customize-master-values-catalogue
Step 4: Enter the Notes as per your preference in the available text area. Add necessary information, while adding notes and Save the note for the Client into the system.

Step 5: Click on the “Save” button to save Notes.

To read the Notes, you can hover/place the mouse pointer on the highlighted Note icon.

If a client profile contains multiple notes, the system displays the most recent notes first to make the notes section easier to review and navigate.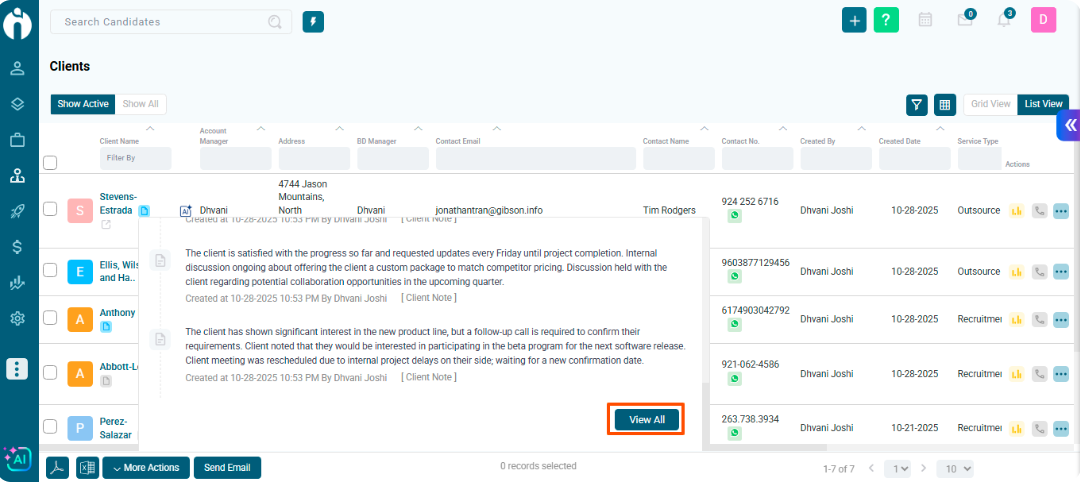
When a client has more than 10 notes added to their profile:
The latest 10 notes are displayed by default.
Users can click on View All to view the complete note history.
To access all client notes:
Go to the Client Management module.
Open the required client profile.
Navigate to the Client Notes section.
Click on View All to display all available notes.
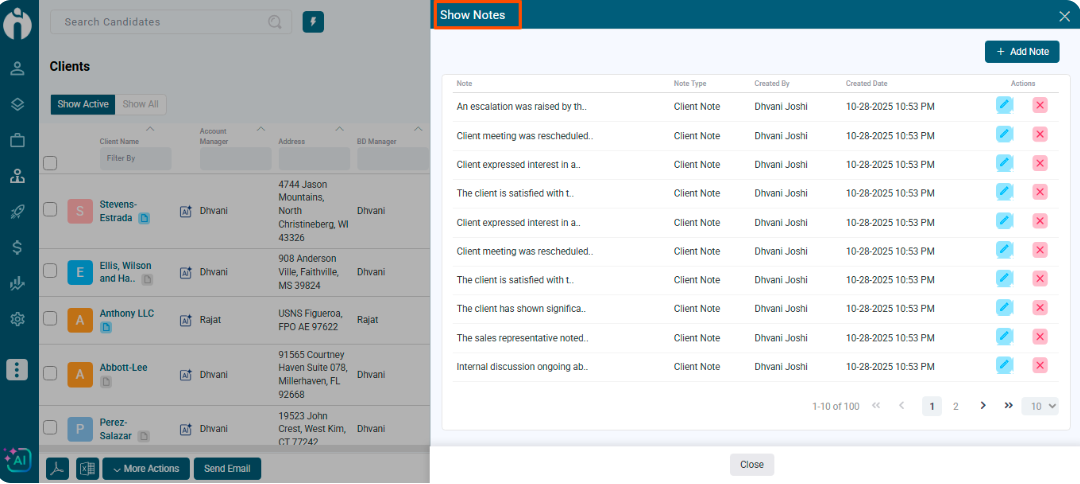
If the Note is added for the Client, you can see the Notes icon in blue colour. Click on the Client Name and see the Notes section in the right-side panel. On the mouse hover you can see a pencil icon. Click on the Pencil icon of the respective note to edit.

If the Note is added for the Client, you can see the Notes Icon in blue colour. Click on the Client Name and see the Notes section in the right-side panel. On mouse hover, you can see a Delete icon. Click on the Delete icon of the respective note to remove it.