The Autopilot Workflow feature in iSmartRecruit allows you to automate routine actions you perform on candidates. By setting up workflows with specific triggers, filters, and actions, you can streamline your recruitment process and significantly reduce manual effort. This feature helps you stay efficient and consistent by automatically performing follow-up actions based on defined conditions—and can reduce up to 20–30% of a recruiter’s daily workload.
.png)
Written by Nikita T
Go to the Admin section > other > and open the Autopilot Workflow.
Click the Add button to start creating a new workflow.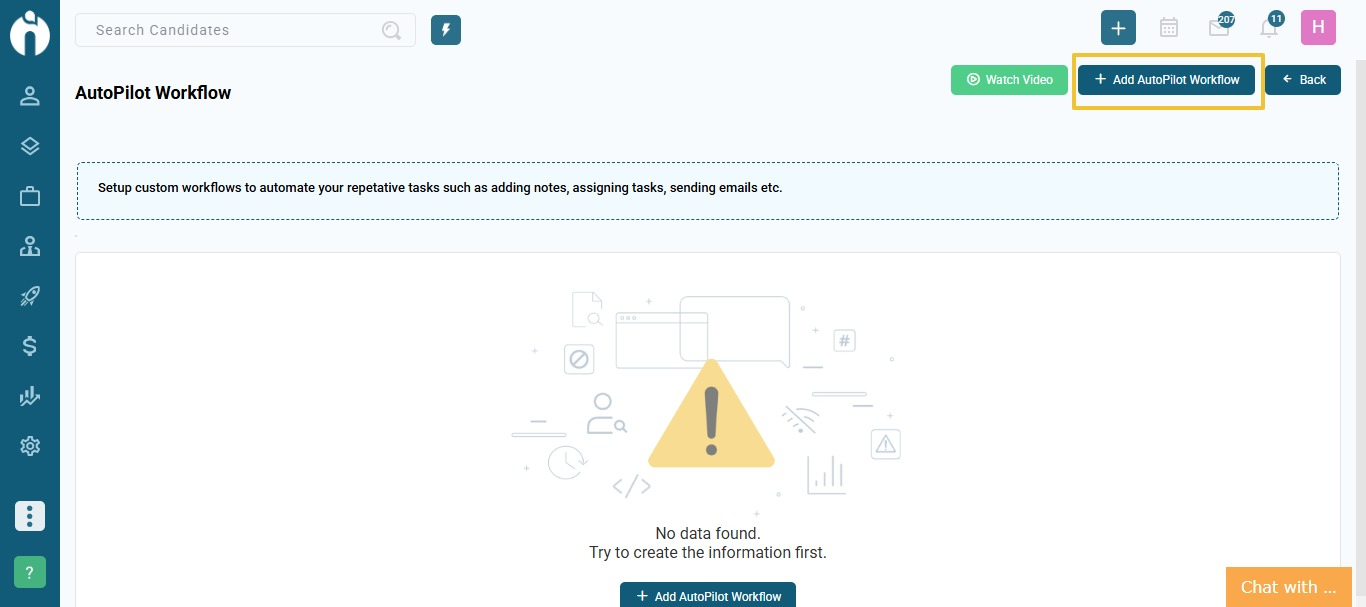
Enter a descriptive Workflow Name to help you easily identify it later.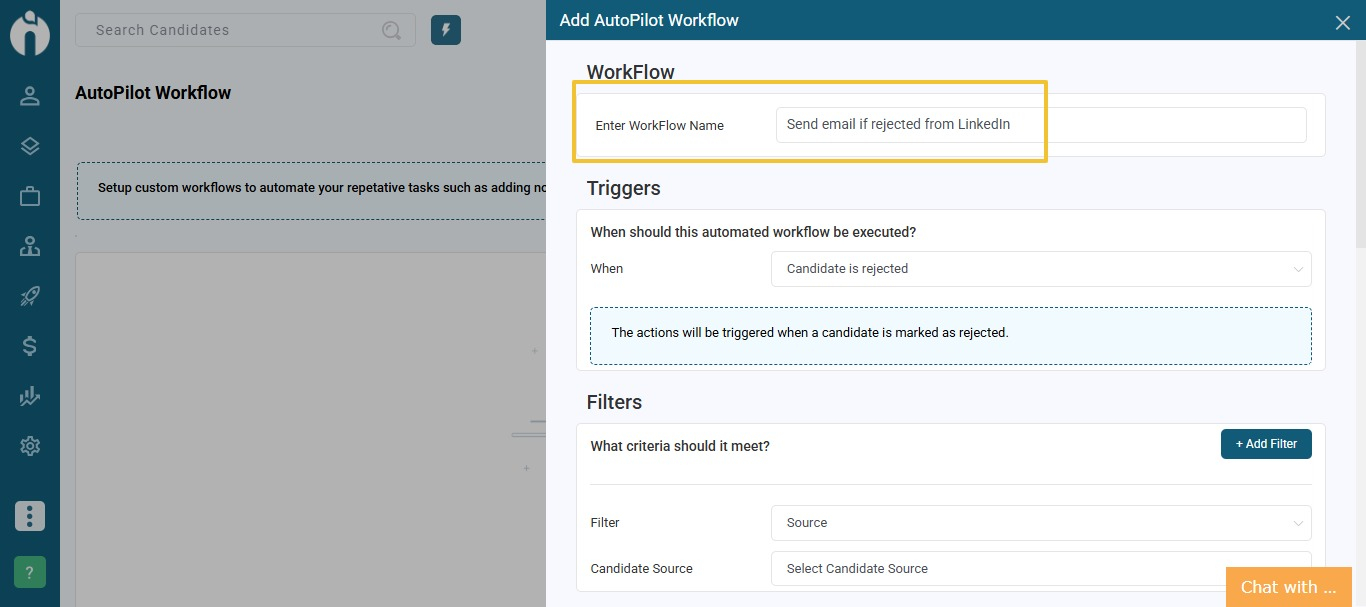
Choose the condition that will initiate the workflow. The system supports the following triggers:
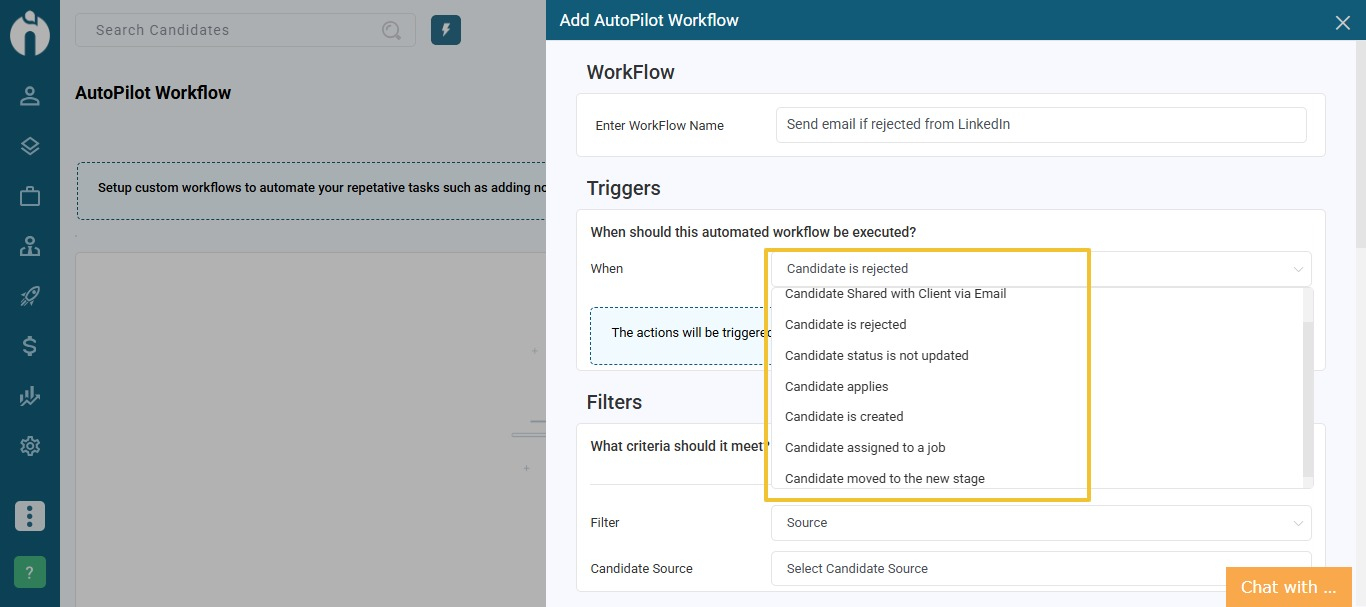
When a candidate is rejected
The workflow is triggered when a candidate’s status is updated to "Rejected".
When the candidate status is not updated
The workflow runs if a candidate's status hasn't changed for a defined number of days.
Candidate Shared with Client via Email
This trigger activates when candidates are shared with a client using the "Send Email to Client" option.
When a candidate applies
The workflow is triggered as soon as a candidate submits an application.
When a candidate is created
The trigger activates when a new candidate is created in the system.
When a candidate is assigned to a job
The workflow is initiated when a candidate is assigned to any job.
When a candidate is moved to a new stage
This trigger activates when a candidate's status is changed to defined status.
Add filters to narrow down which candidates the workflow should apply to after the trigger is activated. Available filters include:

Candidate is assigned to multiple jobs
The workflow will be triggered only when the selected trigger occurs and the candidate is assigned to two or more jobs at the same time.
Candidate has a specific status
The workflow will execute when the trigger action is performed only if the candidate is currently in the specified candidate status.
Candidate comes from a specific source
The workflow will run when the trigger occurs only if the candidate was added to the system from the defined candidate source.
Note: Once a filter is selected, the system will prompt you to choose a specific value. For example, if you select the "Candidate Source" filter, you’ll be asked to choose the relevant source name from your list.
Choose the action the system should perform when the trigger and filters match. Available actions include:
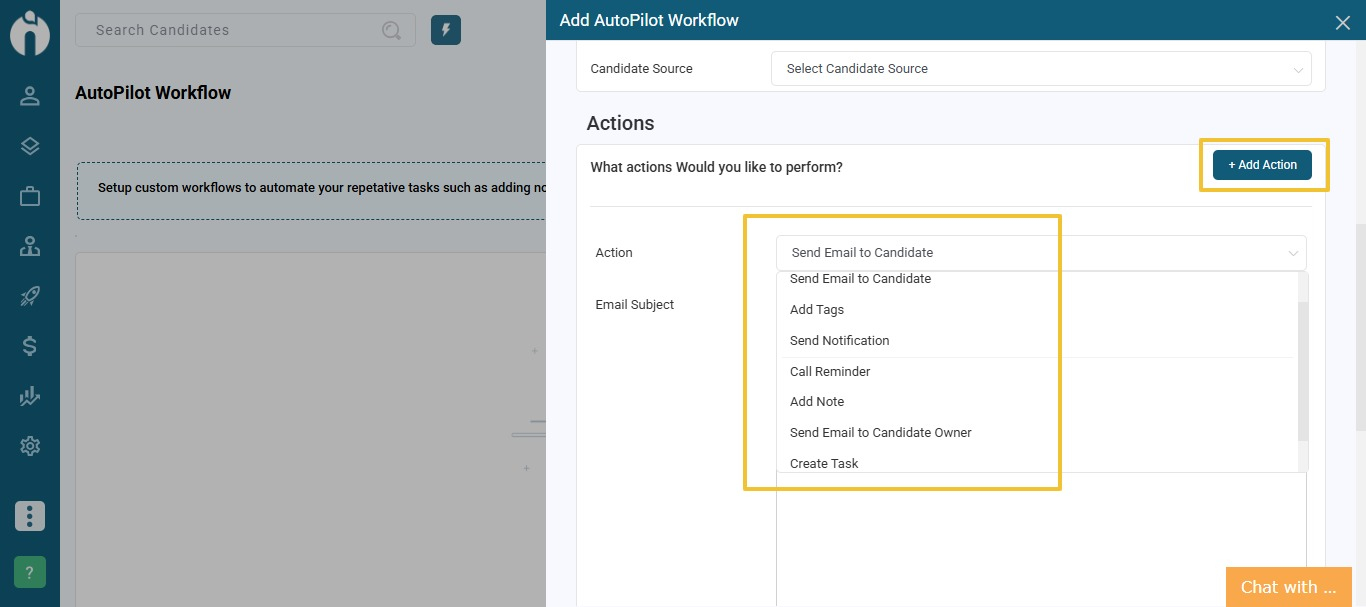
Send Email to Candidates
Sends a predefined email directly to the candidate.
Send Email to Candidate Owner
Sends a predefined email to the user who assigned the candidate to the job.
Add Tags
Adds the specified tags to the candidate’s skill set.
Send Notifications
Sends desktop (bell icon) notifications to selected users.
Set Call Reminder
Creates a call reminder for the candidate within the defined time frame.
Add Notes
Automatically adds a note to the candidate’s profile.
Create Task
Creates a task associated with the candidate for follow-up or action.
Update Stage
Updates the candidate’s status to the specified stage in the recruitment workflow.
Note: Each action may require additional configuration. For instance, selecting "Send Email" will prompt you to define the email content and recipients.
Once all fields are completed, click Save to activate the workflow. The system will automatically perform the defined actions whenever the conditions are met.

To edit a workflow, click the pencil icon.
To delete a workflow, click the X icon next to it.

If you need assistance setting up or managing Autopilot Workflows, feel free to contact our support team via In-app Chat Support or create a ticket from Profile Menu → Create Ticket