Record the summary of calls into the system with the help of Call History option.

Written by Bhavik B
The recruiter has to deal with many Candidates in their daily recruitment process. For one reason or another, it may be difficult to remember conversations with specific Candidates on call. Keeping a conversation history will help the recruiter synchronize the process with other recruiters.
In the system, you can store conversations with Candidates. There are a couple of distinct ways to store call history for candidates, explained below.
Click on the Candidate Module on the left side menu, and the Candidates Screen will appear.
Navigation Link:https://app.ismartrecruit.com/quickSearch

Click on the name of the Candidate, and Candidate View Dialogue will appear.

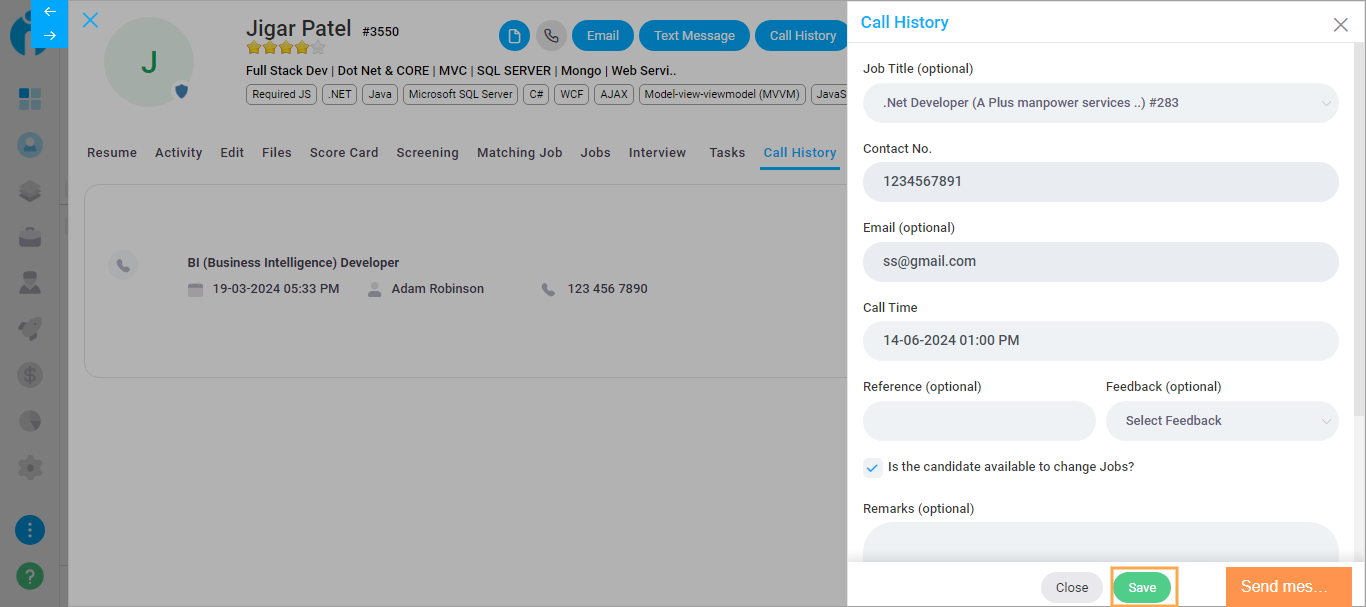
Click on the “Call History” button.

Select the name of an active Job from the dropdown if you want to contact the Candidate to know their interest in the opening.
Contact no. and email ID will be automatically filled if available with a system else users have to find an alternate way to find and add contact no. as it is a mandatory field in call history.
Select the Date from the date-time picker control to store the conversation date and time.
Select the feedback of the user from the dropdown. If a user is interested in a Job or ready to change Jobs, marked as “Available”.
In case there is still one more call required to get confirmation, create a Call Reminder by marking it and add remarks to add comments to keep important conversation points that may help for further reference.
Click on the “Save” button to store the conversation.

OR
Click on the “Call History” tab.

You can also add call History from here while clicking on the + icon. Below given picture will clear you more about the same.

once you add your call history you can save it by clicking on the save button at the bottom.
Click on the plus icon available on the header section and select the “Add Call History '' option from the menu.
Navigation Link:https://app.ismartrecruit.com/dashboard
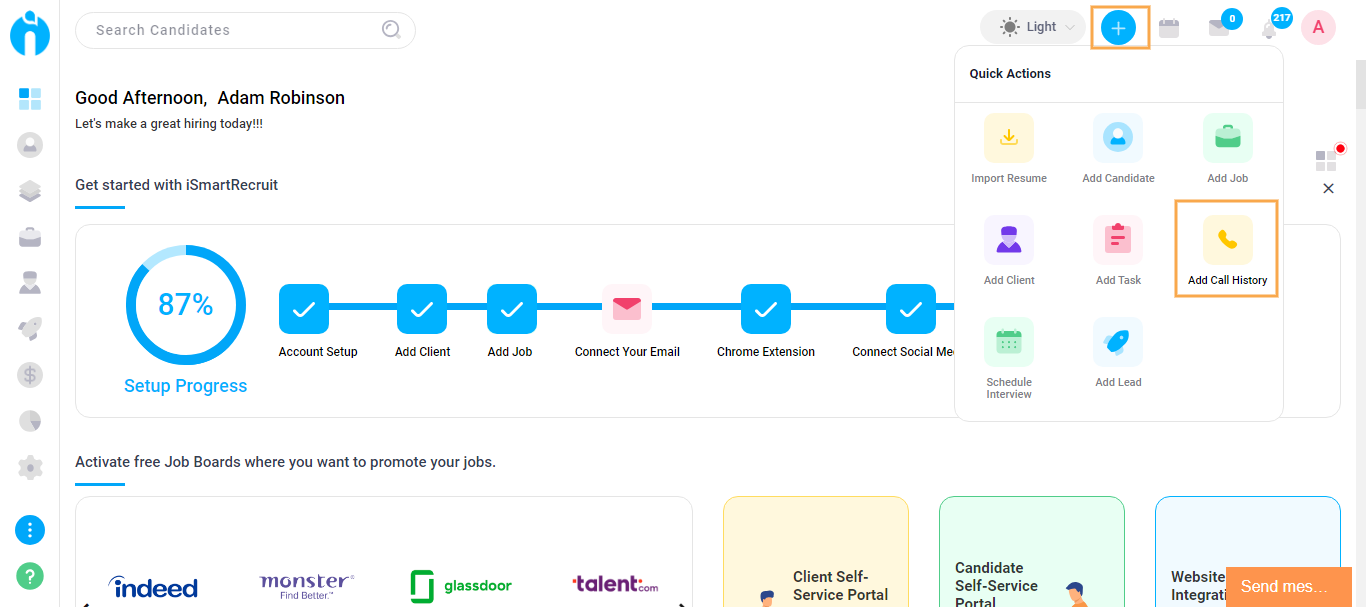
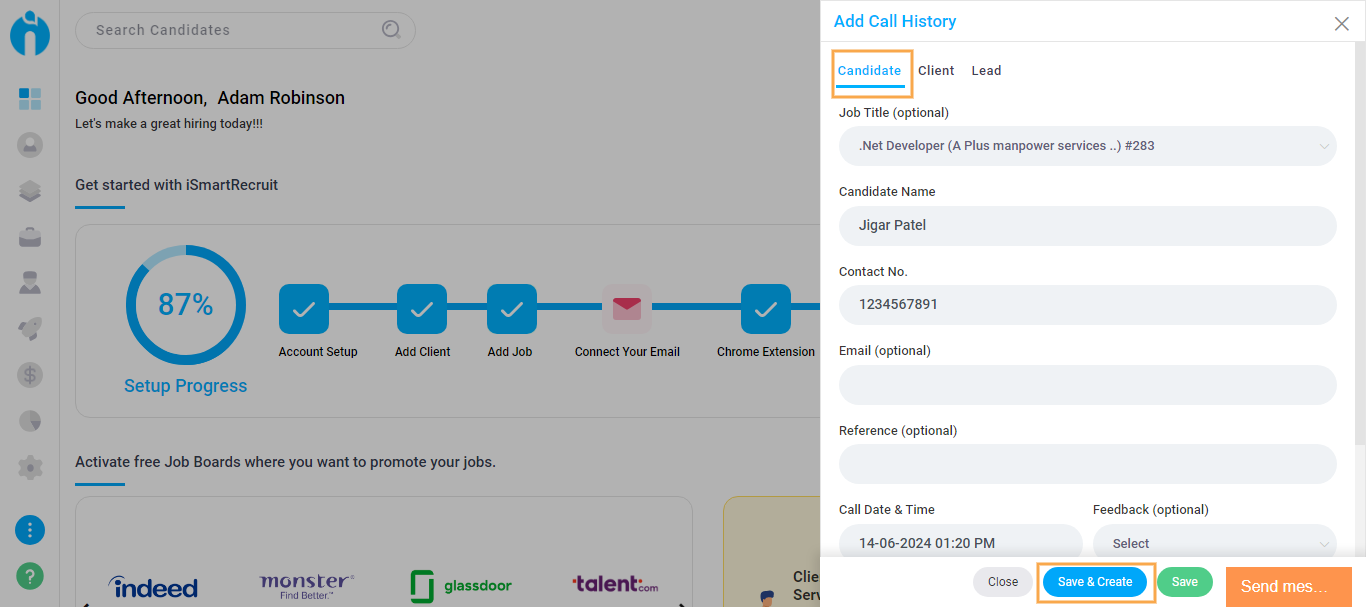
The “Add Call History” screen will appear.
By default, the Candidate option will be selected. Here, you have to enter the name of the Candidate else for whom you want to “Add Call History”. The remaining processes are the same as “Add Call History (Candidate Specific).
Click on “Save & Create” if you want to add another Call History.
Click on the candidate's name and select the "Call History" tab. Click on the pencil icon to modify the details. Modify the details according to your preference and click the "Update" button.

After clicking on the pencil icon to edit the candidate call history, the form will appear, as shown below. Here, you can edit and update your candidate call history.

Click on the X Icon to delete/remove the Call History.